
Whitelist
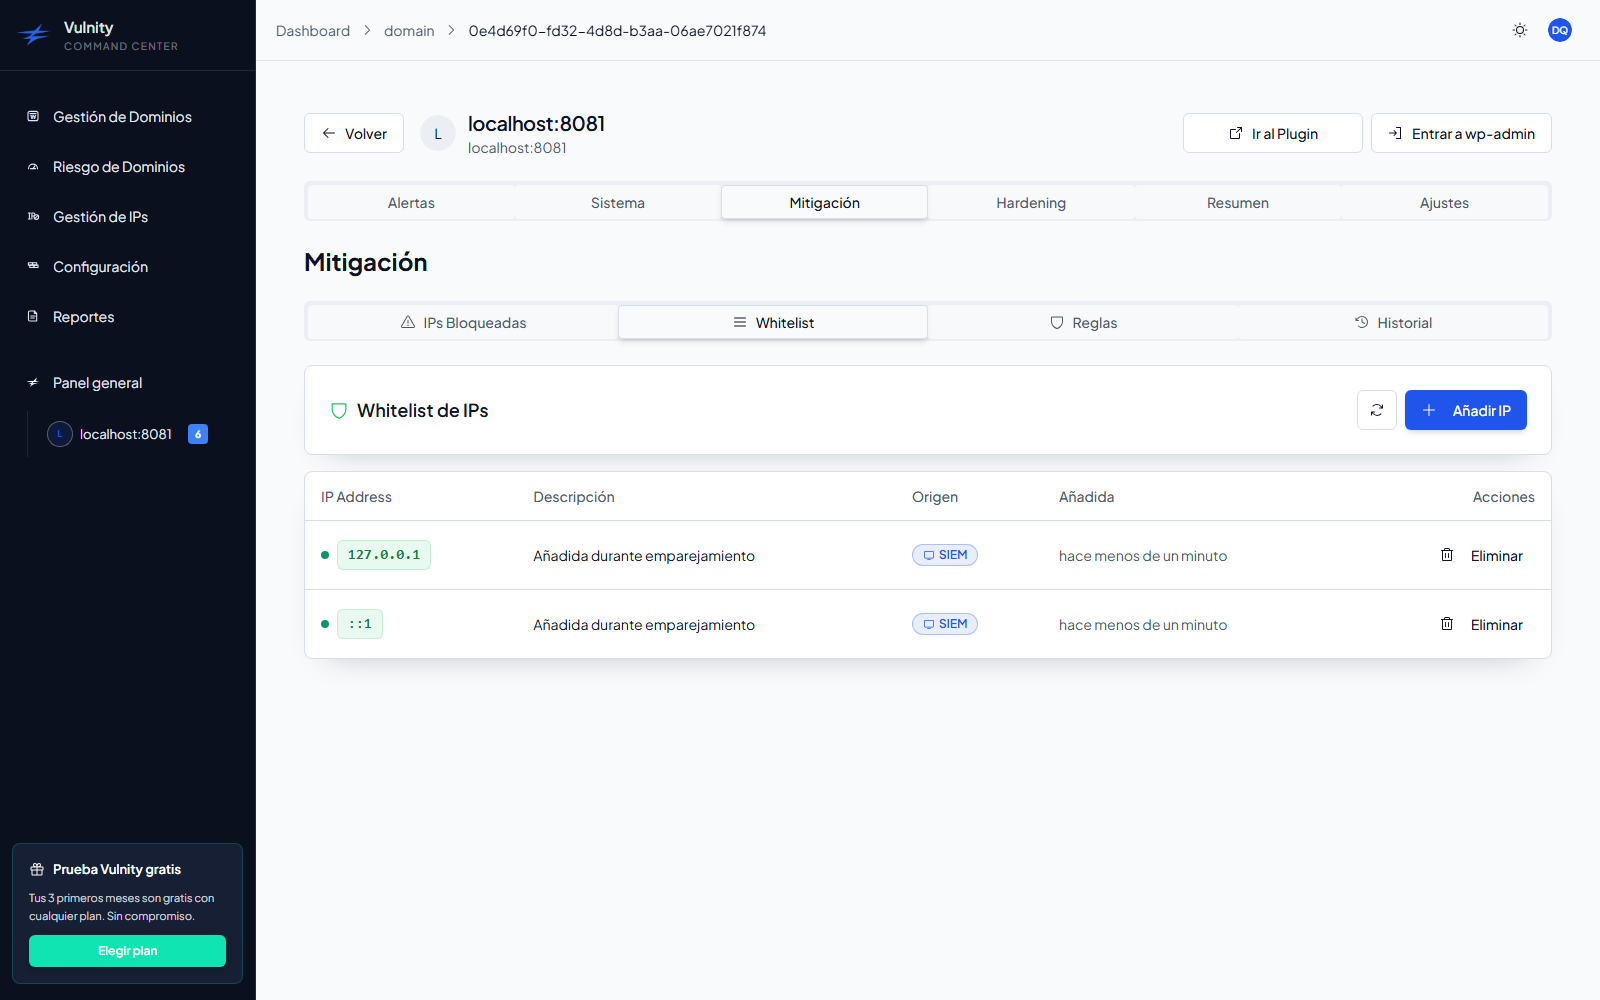
The Whitelist sub-tab defines the IP addresses that will never be blocked automatically by the mitigation system, no matter how many alerts they generate — a critical protection to avoid locking out administrators, offices, and other legitimate systems.
How it works
Section titled “How it works”The whitelist is managed from the panel and synchronized to the plugin: every IP you add or remove here is pushed to the WordPress site immediately, and the plugin does not allow editing the list locally. Whitelisted IPs are immune to automatic blocks; an administrator can still block them manually if needed.
What the list shows
Section titled “What the list shows”Each entry displays:
- IP address — the protected IPv4 address.
- Description — who or what uses that IP.
- Origin — a SIEM badge for IPs added from the panel, or an Initial IP badge for the IP added automatically during pairing (the address that connected the plugin).
- Added — when the IP joined the list, as relative time.
Add an IP to the whitelist
Section titled “Add an IP to the whitelist”-
Click Add IP to open the dialog.
-
Enter the IP address (IPv4, validated in the form) and a description — optional, but recommended to document the entry, for example “Main office” or “Monitoring server”.
-
Confirm with Add to Whitelist. The IP is stored for the site and pushed to the plugin immediately.
To remove an entry, click Remove on its row — the change also syncs to the plugin, and from that moment the IP can be blocked automatically again.
When to use the whitelist
Section titled “When to use the whitelist”- Administrator IPs — your office/home IP, your development team, the site’s administrators.
- Technical infrastructure — monitoring servers, automated backups, APIs that interact with the site.
- Corporate locations — fixed office IPs, company VPN.
- False-positive resolution — legitimate IPs that repeatedly trigger alerts.
Best practices
Section titled “Best practices”- Add your administrator IP right after enabling mitigation rules — especially before enabling the User Manipulation or File Editor rules.
- Document each IP clearly with its description.
- Review the whitelist periodically and remove stale entries.
- Avoid whitelisting dynamic IPs that change frequently, or adding IPs “just in case”.
Important warnings
Section titled “Important warnings”Next steps
Section titled “Next steps”- Rules — enable automatic blocking once your trusted IPs are protected.
- Blocked IPs — review and manage the IPs currently blocked.
- Whitelist in the plugin — how the site applies the synchronized list.