
Add sites in bulk (VPS / WP-CLI)
The bulk pairing assistant connects many WordPress installations that live on the same server (VPS, dedicated, or shared with SSH) in a single guided flow. It is designed for agencies and teams that maintain multiple sites.
Instead of copying a Site ID and Pairing Code for every site, you generate one temporary key and run a command on the server that installs and pairs each site automatically. There is no CSV import: the flow is command-driven for safety, and every command is generated for you in the panel so you only copy and paste.
Requirements
Section titled “Requirements”- SSH access to the server that hosts the WordPress installations.
- WP-CLI available on that server.
- Each site must run WordPress 6.2 or newer and must not be a Multisite network.
- Enough domain quota in your plan for the sites you want to connect.
The assistant step by step
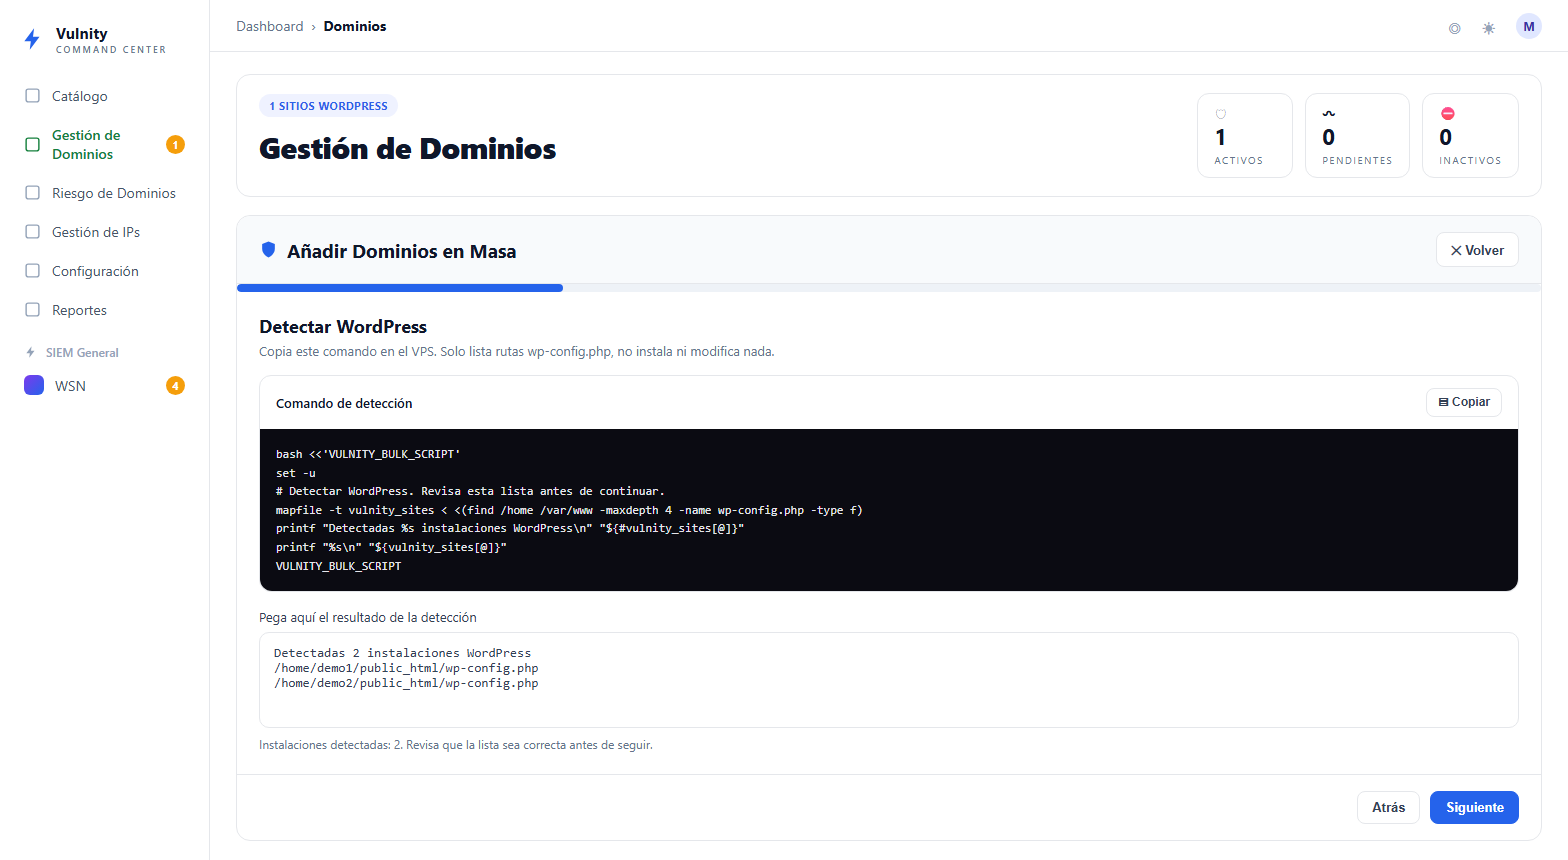
Section titled “The assistant step by step”In Domain Management, click Bulk add. The assistant opens a 4-step wizard — Detect → Select → Precheck → Install & pair — with a progress bar at the top.
-
Detect WordPress.
The panel gives you a read-only command that lists the
wp-config.phpfiles on the server. It only lists paths; it does not install or change anything. The core of the command is:Terminal window find /home /var/www -maxdepth 4 -name wp-config.php -type fRun it over SSH, copy the output, and paste it back into the panel. The panel sanitizes the list and keeps only valid WordPress paths, showing how many installations were detected.
-
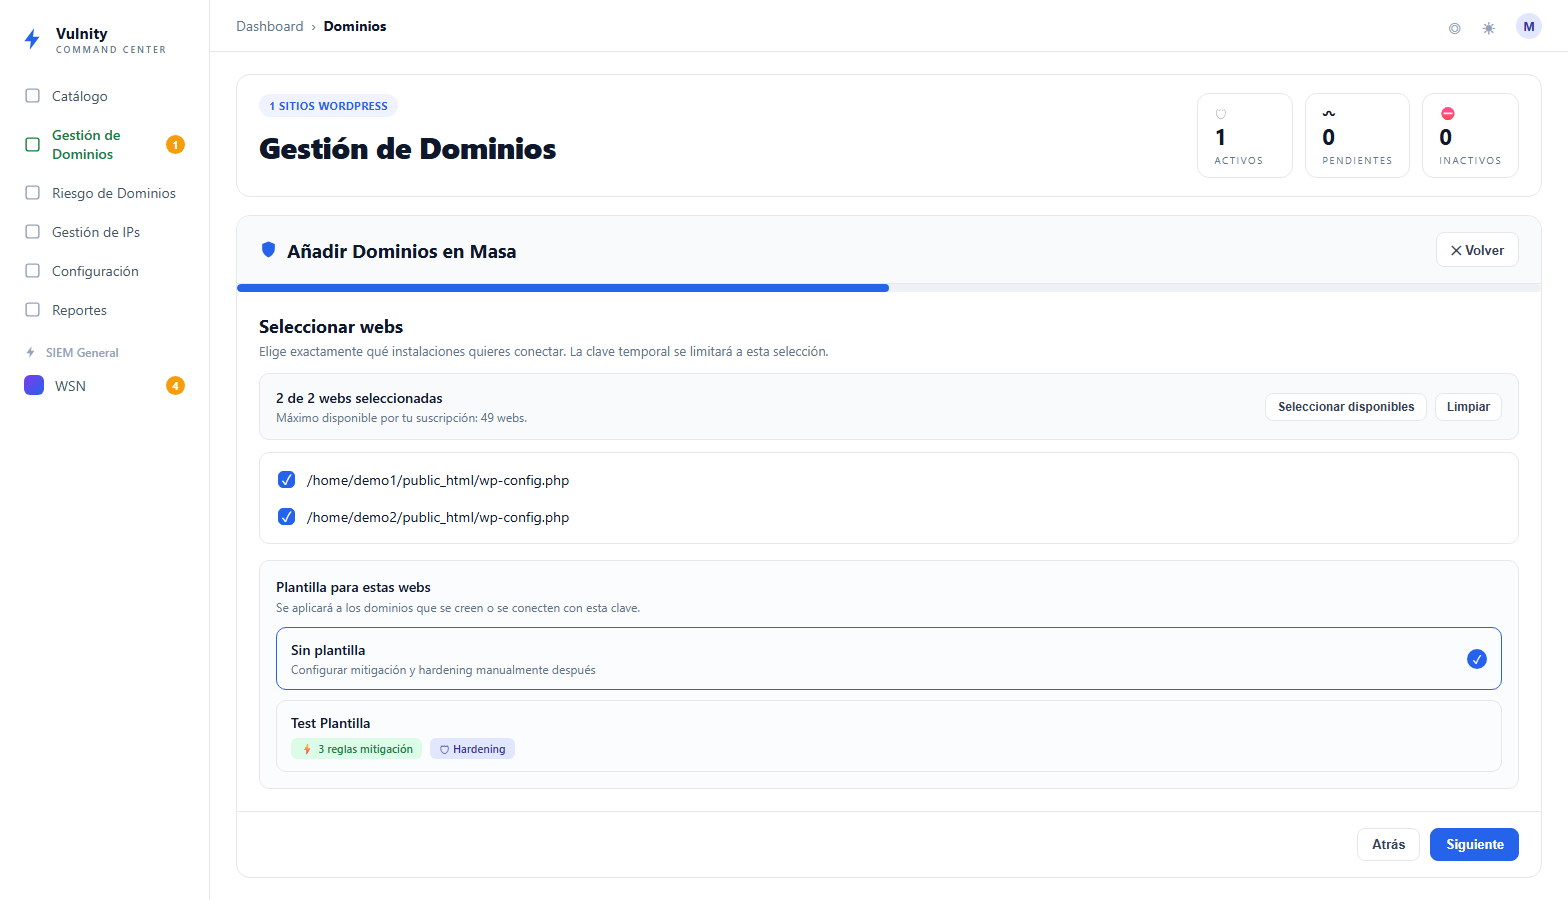
Select the sites.
Choose exactly which installations you want to connect. The number you can select is limited by your remaining domain quota (for example 4 of 10 sites selected). Use Select available or Clear to manage the selection.
You can also pick a template here: the hardening and mitigation rules it contains will be applied to every site created or connected with this key.
-
Run the precheck.
The panel gives you a second command that validates each selected site with
wp core is-installed. Like detection, it does not install or modify anything. Run it, then paste the output. Only sites reporting[OK] WordPress valido:move on to the final step.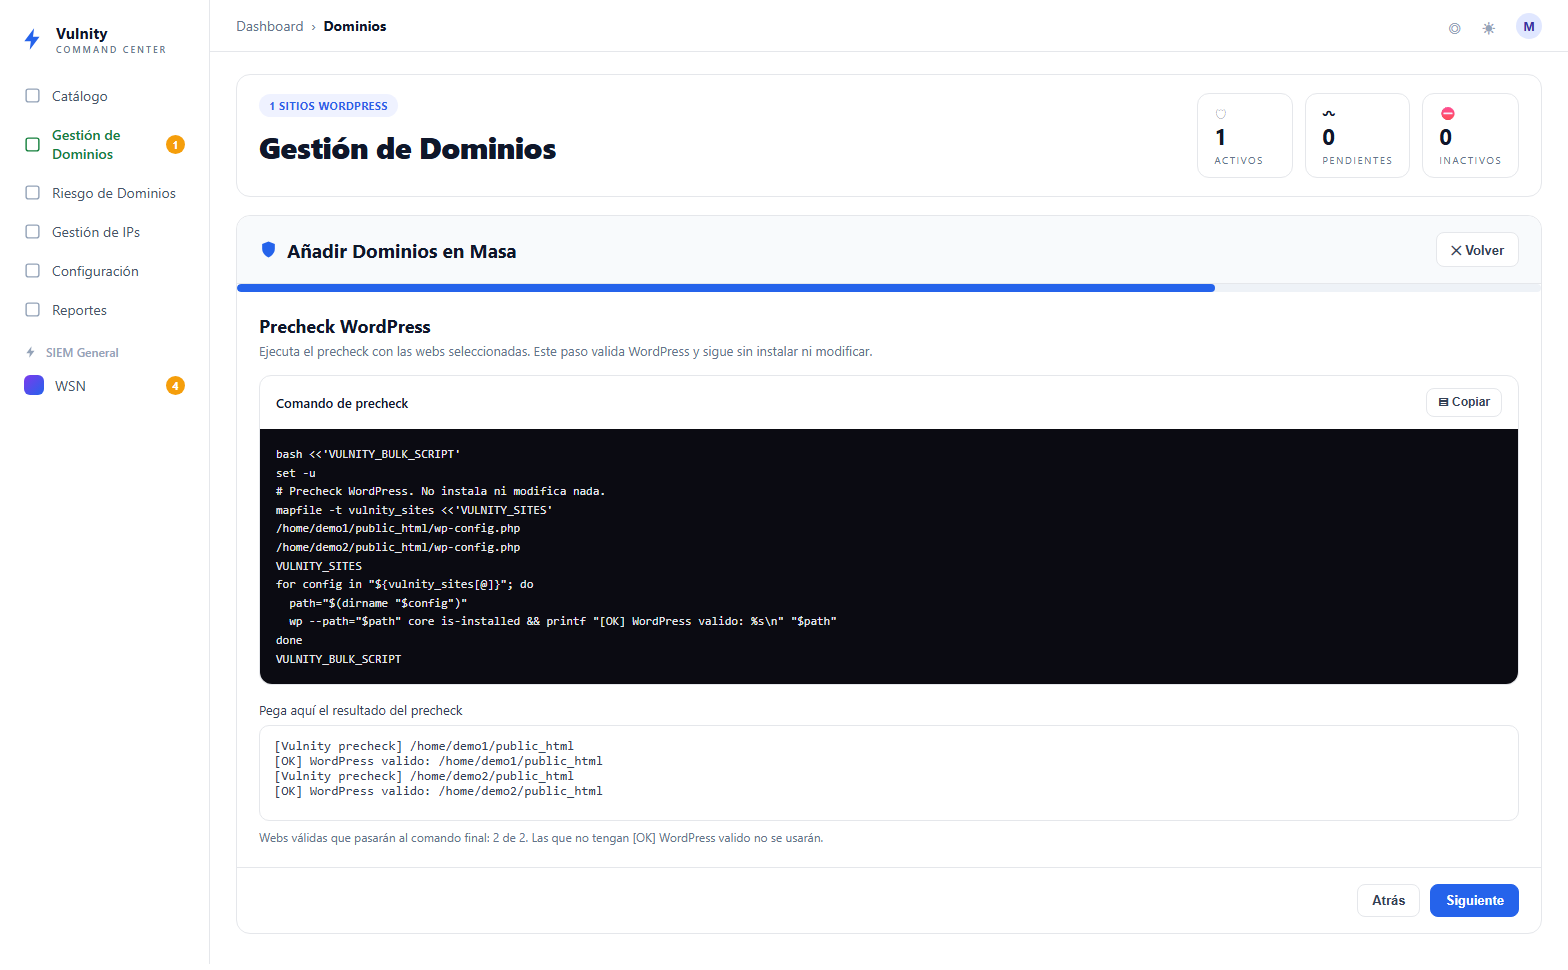
-
Generate the key and pair.
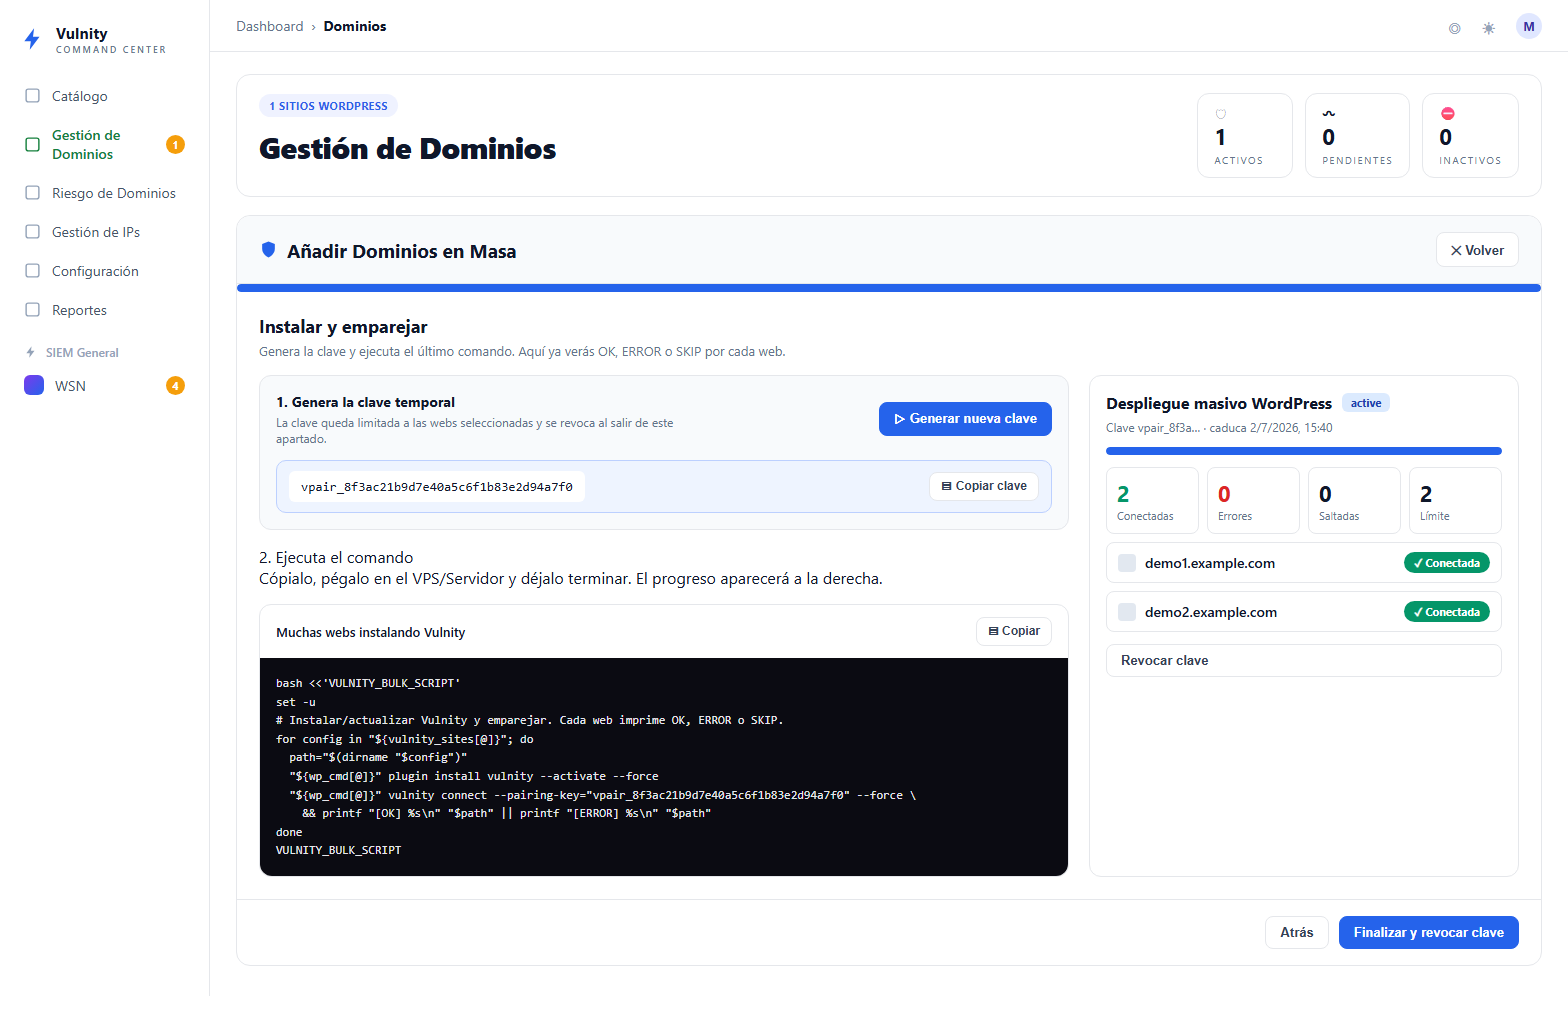
Click Generate key. The panel issues a temporary key in the form
vpair_…. The key:- is valid for 24 hours,
- is limited to the sites you selected (and to your available quota), and
- is revoked automatically when you leave the assistant.
Copy the final command the panel generates and run it on the server. For each site it installs and activates the Vulnity Security plugin and pairs it, printing
OK,ERROR, orSKIPper site while the rest continue.Watch the live progress panel: it updates automatically with Connected, Errors, and Skipped counts and a per-site result. Sites that were already linked are marked as skipped.
When it finishes, click Finish and revoke key to invalidate the key.
Advanced: pair a single server manually
Section titled “Advanced: pair a single server manually”The plugin also exposes a WP-CLI command directly. This is what the bulk command runs under the hood, and you can use it on its own:
wp vulnity connect --pairing-key=vpair_xxxxxxxxxxxxxxxxUseful flags:
| Flag | Purpose |
|---|---|
--dry-run | Run local prechecks only. Does not change configuration or contact the panel. |
--public-ip-whitelist=<ip> | Add a public IP to the site’s local whitelist during pairing. |
--force | Re-pair even if the site already has an active connection. |
--allow-db-fallback | Allow database storage when the vulnity-data folder is not writable. |
Troubleshooting
Section titled “Troubleshooting”- Site already linked — the assistant marks it as skipped and continues. Use
--forceonly if you intend to re-pair. - A site shows ERROR — re-run the final command; sites already connected are skipped, so only the failed ones are retried.
- Key limited to fewer sites than expected — you hit your plan’s domain quota. Free capacity or upgrade, then generate a new key.
- Storage precheck failed — the site’s
vulnity-datafolder is not writable. Fix permissions, or add--allow-db-fallback.
Next steps
Section titled “Next steps”- Add a single site — connect one site from the panel.
- Reconnect domains — recover a domain that went inactive.
- Domain management — check the status of every connected site.