
Add a single site
Adding a single site is the fastest way to connect one WordPress installation: a short wizard in the panel creates the domain, and the Vulnity Security plugin on the site completes the pairing — automatically with the assisted link, or manually with the Site ID and Pairing Code.
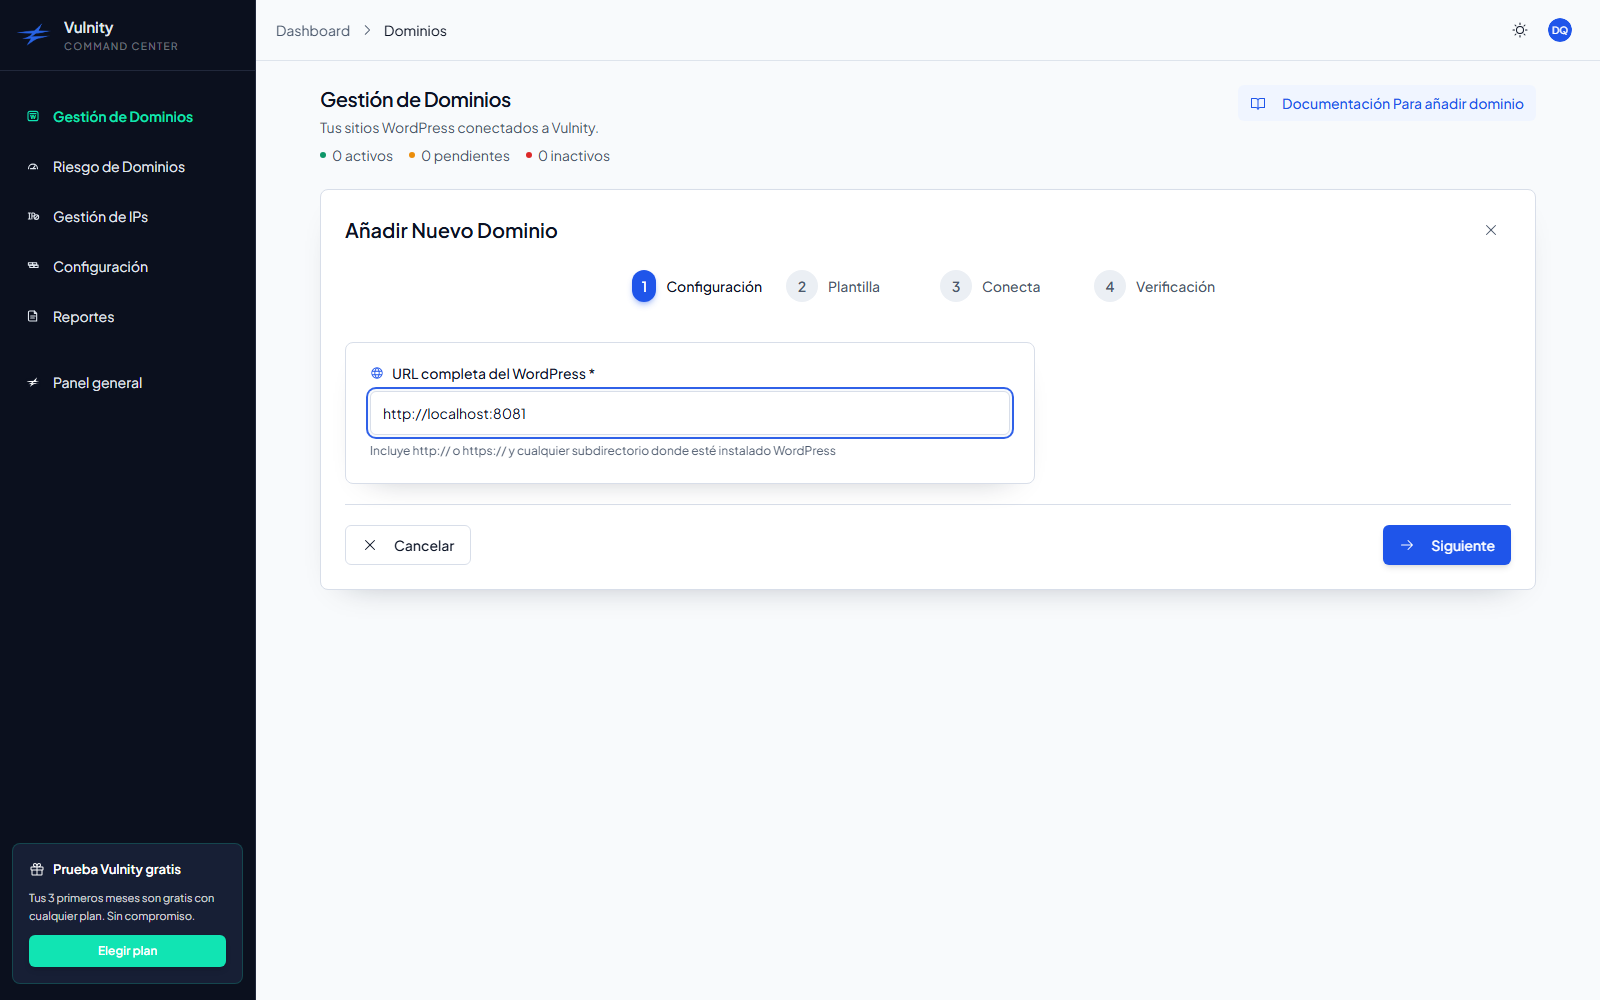
Use this method when you manage one site or a few and you have access to each site’s wp-admin. To connect many installations from a server at once, use Add sites in bulk instead. The wizard has four steps: Configuration → Template → Connect → Verification.
Create the domain
Section titled “Create the domain”-
In Domain Management, click Add Domain to start the wizard.
-
Fill in Full WordPress URL: the complete address including
http://orhttps://and any subdirectory where WordPress is installed (for examplehttps://example.comorhttps://example.com/blog). Click Next.The domain name is derived from the URL automatically; you can edit it later in the domain settings, along with the client contact and a note. If the URL is similar to a domain you already registered, the panel warns you so you do not create a duplicate.
Template (optional)
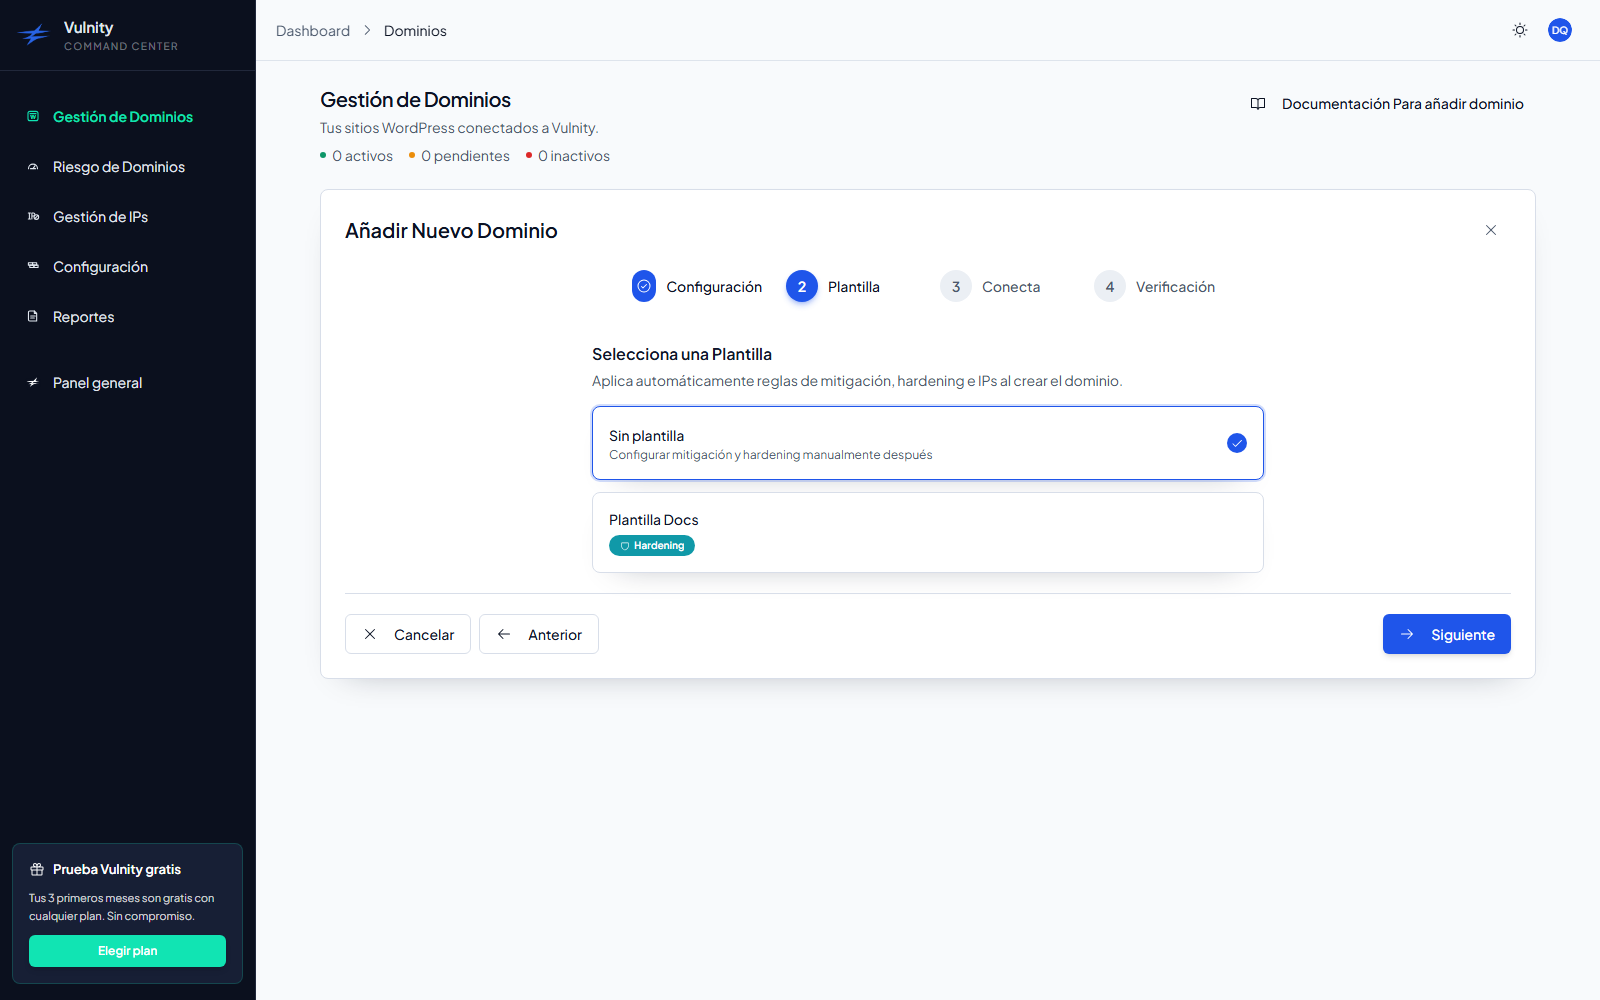
Section titled “Template (optional)”If you have created templates, the wizard shows a Template step where you can pre-select one to apply mitigation rules, hardening, and IP lists automatically when the domain is created. It is optional — you can skip it and configure everything later. If you have no templates, the wizard skips this step on its own.
Assisted connection (recommended)
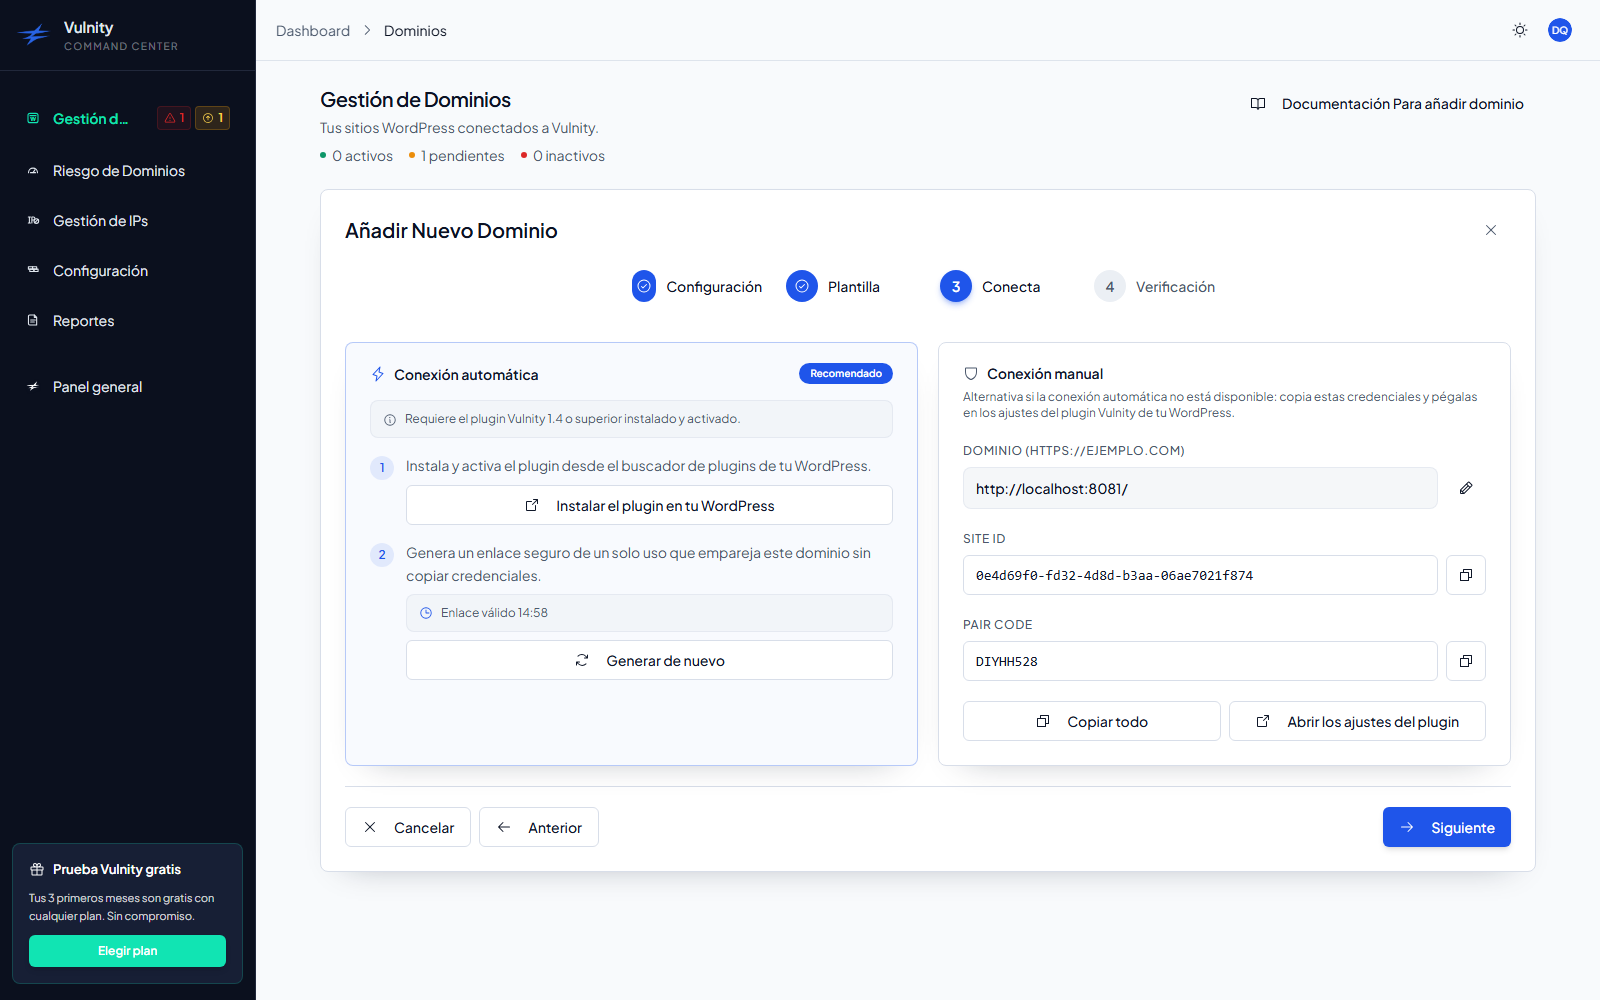
Section titled “Assisted connection (recommended)”The Connect step shows two cards. The Automatic connection card pairs the site through a single-use link, with no credentials to copy.
-
Click Install the plugin on your WordPress — it opens your site’s plugin search in
wp-adminwith Vulnity already searched. Install and activate Vulnity Security. -
Click Connect automatically. The panel issues a single-use connection link, opens it in a new tab, and shows a countdown — the link is valid for 15 minutes. If it expires, click Generate again.
-
In the tab that opens, the plugin shows “Your Vulnity panel requests to connect this site”. Click Connect now — the site pairs automatically, with no Site ID or Pairing Code.
Manual connection
Section titled “Manual connection”The Manual connection card is the fallback when the assisted link is not available: it shows the credentials the plugin needs.
-
In the manual card, review the domain (you can edit it if you made a typo) and copy the Site ID and the Pairing Code — use Copy all to copy both at once.
-
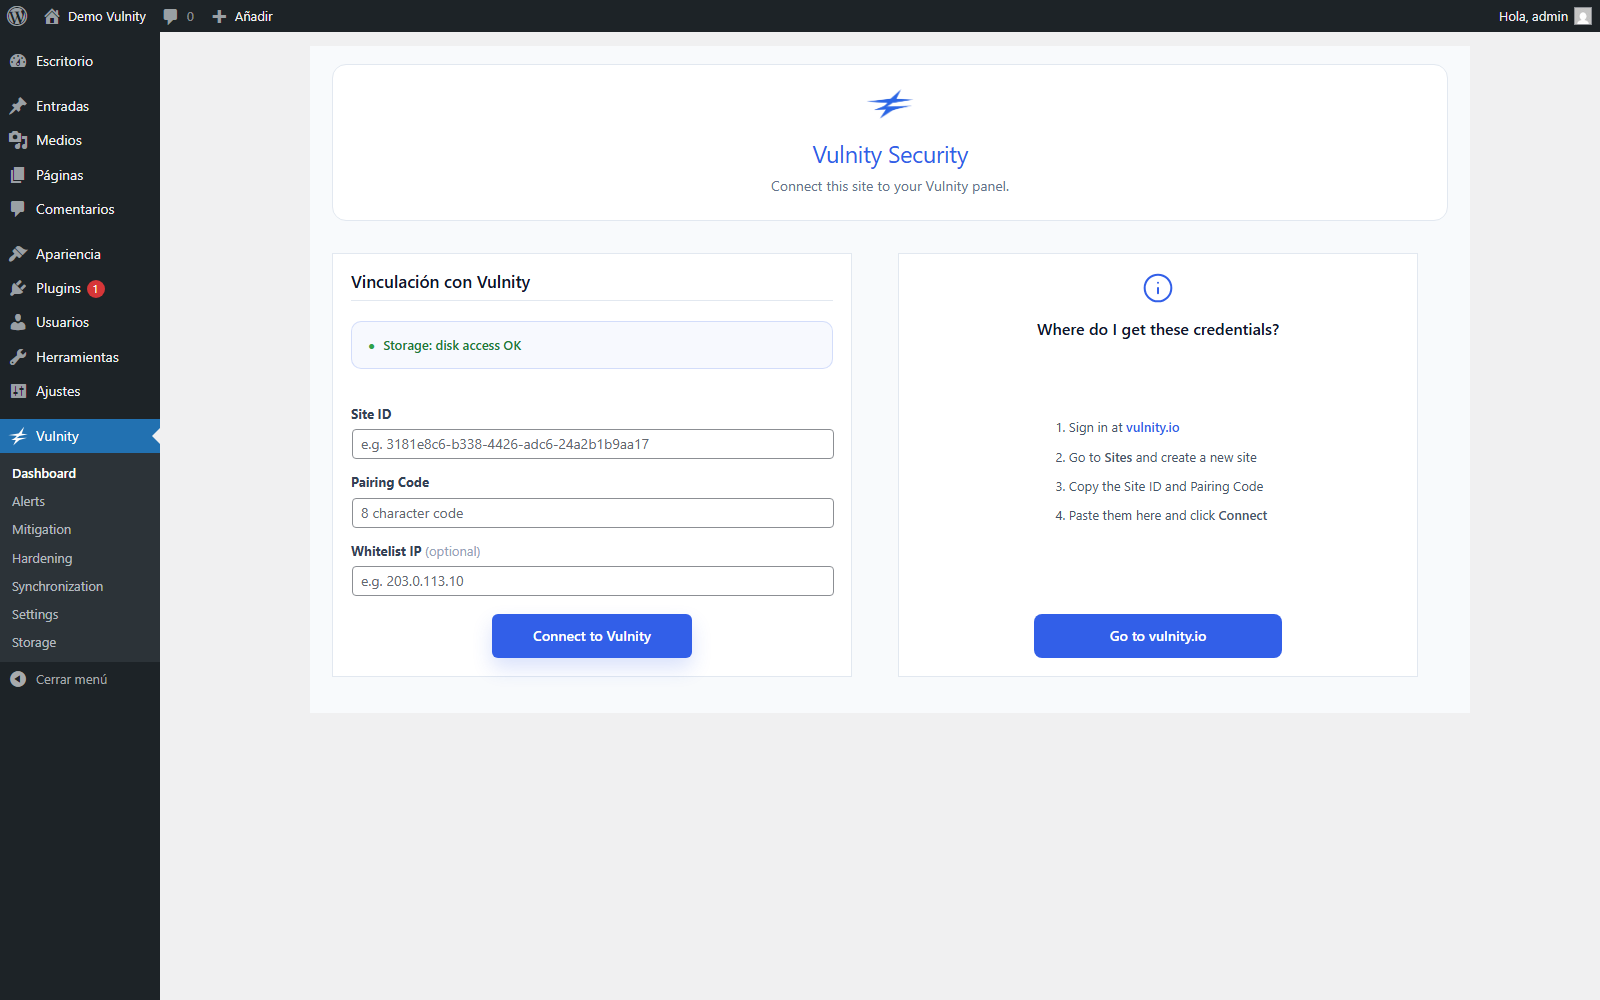
Open the plugin’s setup screen on the site. The Open the plugin settings button takes you there with the credentials pre-filled; otherwise go to the Vulnity menu in
wp-adminand paste them by hand. -
In the plugin, fill in Site ID and Pairing Code (8-character code). Optionally add a public IP in Whitelist IP so that address is always allowed. Click Connect to Vulnity.
Verification
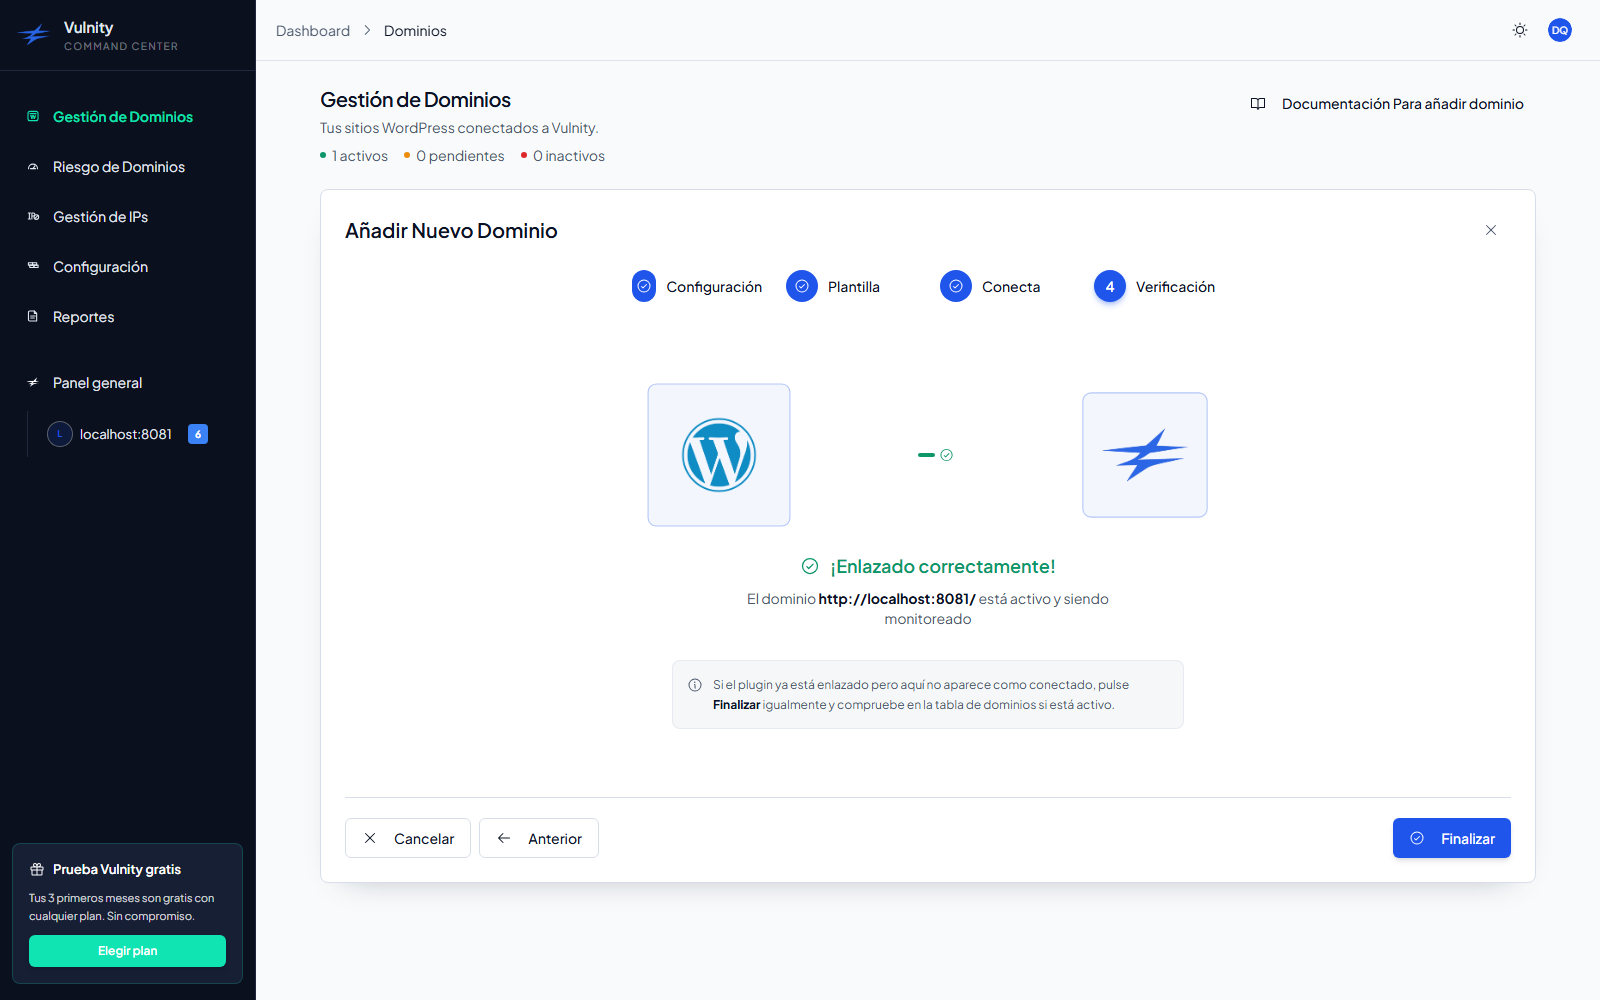
Section titled “Verification”The panel checks the pairing every few seconds from the Connect step onwards and jumps to Verification on its own. When the plugin connects and the first heartbeat arrives you will see “Successfully linked!” — click Finish. The domain appears as Active in Domain management.
If you reach your plan limit
Section titled “If you reach your plan limit”Each plan allows a maximum number of domains. If you are at the limit, the panel shows a message with your current plan and blocks the new domain. Free capacity by removing a domain, or upgrade your subscription to add more.
Next steps
Section titled “Next steps”- Assisted connection link — how the single-use link works in detail.
- Add sites in bulk — connect many sites from a server.
- Reconnect domains — recover a domain that went inactive.
- Domain management — check the status of every connected site.